|
|
|
|
Step
1 |
Step
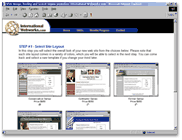
1- Select Site Layout: After selecting "Build Your Site Now", your first step will be to select your site layout. Take a look at the sample sites, and choose the design you think best suits your needs. Remember, in the next step, you may choose color variations for each. Also, at any time you may go back and try a different design - have fun experimenting! |
| Step
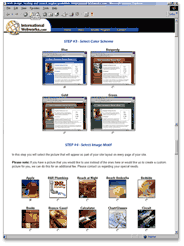
2 & 3 - Select Color Scheme & Photo: Once you've chosen your layout, you will continue to steps 2 & 3. Here you will decide on a color scheme (Step 2), and also choose a site photo (Step 3) that will appear as part of your site layout on every page of your site. You can mix and match colors and photos until you find the perfect combination! There is a "View Sample Page" button at the bottom of the screen to help you visualize your choices. Please note: If you have a picture that you would like to use instead of the ones here, or would like us to create a custom picture for you, we can do this for an additional fee. Please contact us regarding your special needs. |
Step
2 & 3 |
|
Step
4 |
Step
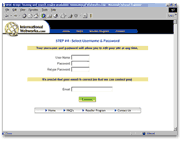
4 - Select Username & Password: Now you've reached the page where you will choose your username and password. This is the member information you will use to login from the home page, bringing you to a control panel (see below) where you can update and manage your site 24 hours a day, 7 days a week! You must also enter your email address - please be accurate in case we need to contact you! |
| Welcome
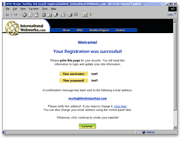
Page: You will next be presented with a welcome page to let you know your registration was successful, and to verify your username and password choices. This information will also be emailed to the address on the screen. If there is any problem with this address, you will have an opportunity to make that change here. |
Welcome
Page |
|
Site
Information & Buttons |
Site
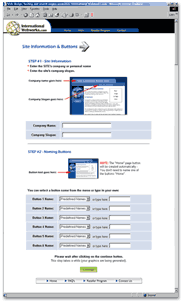
Information & Buttons: On this page you will enter your company's name and an optional slogan. This information will be displayed at the top of your template, and a sample site snapshot points out this placement. You will also name your site's buttons. You have two ways to do this. First, you may choose an appropriate name from the drop-down list. If you need something specific, you may type the button name in the text box to the right of the drop-down list. When you click "continue", your buttons with text will be generated! Note: You do not need to use all the buttons, only as many as you need. Again, you may add buttons at a later point via the control panel. |
| Control
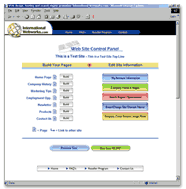
Panel: The control panel is where you will maintain your site, such as editing your account information, building your pages, changing your company name, adding keywords for search engine optimization, changing the layout, color scheme and site photos, and more! You go directly to your control panel by logging in the member's area on the home page, using the username and password you selected in Step 4. Note: There is detailed help available for each area of the control panel by clicking on the "help" button at the top of the page. |
Control
Panel |
|
Want to give it a try? Remember - it doesn't cost a thing to build and preview your site! Note:
If you need assistance in setting up your site, we will do it for
you free of charge.
|
|
